
Over the past month, we have used six identical printers as part of our 3D Print Farm to produce PPE for local keyworkers. In just over a month we’ve produced and dispatched over 1200 pieces (and counting) of PPE. You can read more about that project here.
This review will be through the lens of its use for our print farm project, but also the general experience for beginners.
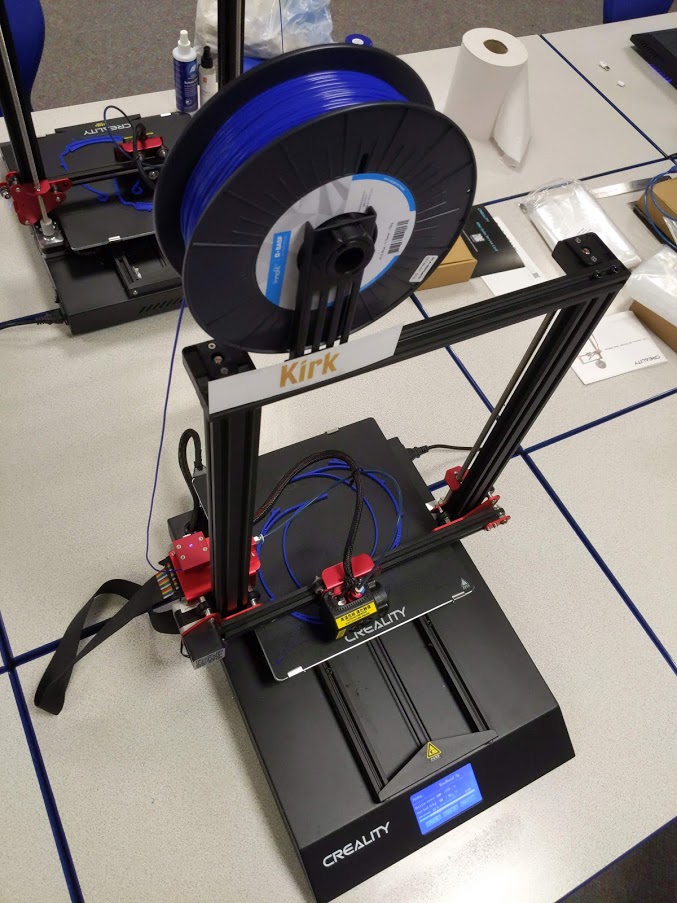
For such a task, we needed an affordable, easy to maintain and reliable printer with a good reputation in the community. We chose to use the Creality CR-10S Pro, which at the time of purchase was £420 (ex VAT) and decided that having six identical printers would help make our jobs easier, and therefore the production quicker.
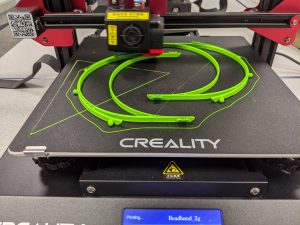
We mostly like the design of the printer. The large print bed means we can fit lots of models on there at the same time (up to 3 of the larger Prusa headbands can take just under 6 hours) and decrease the amount of time spent swapping between prints. It comes in at 300x300mm, and if you need to print particularly tall models, it can go up to 400mm. We’re yet to experiment with it to that extent, however.
The touchscreen is large, bright and responsive with an easy menu design. Although there are some minor translation issues and extra clarity needed in some places as to what exactly a function does, it is generally a beginner-friendly design and simple to use. There is a microSD card and USB port on the side for storing .gcode files or connectivity to a PC.
The recommended Creality slicing software is functional but a little outdated and clunky, and uses an older version of the Cura engine. We much prefer to use a modern version of Cura with the correct profile set up for printing – this has a cleaner user interface. We’re also more familiar with it, having previously used it for our Ultimaker 2.
Setup for our Creality printer was relatively easy, and the package includes a quick-start manual with clear images. We would have preferred it if there was more detailed documentation available to download online although a video is loaded onto the included microSD card.
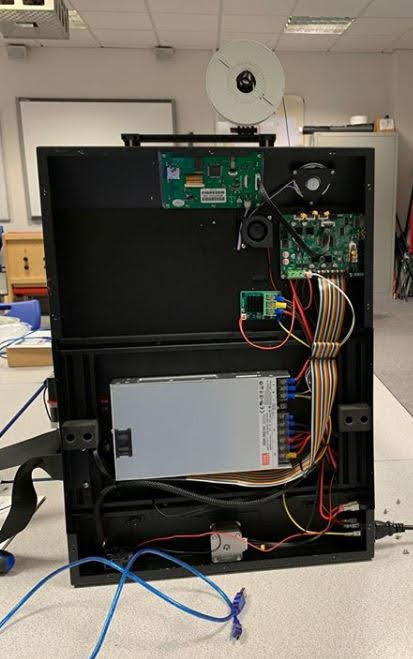
Custom firmware and updates can be flashed onto a second microSD card slot, located on the base of the printer. Disassembly to access this is simple, and the firmware flashing process isn’t too troublesome – there are plenty of guides and forums online to help as this is a very popular printer model. It is worth noting that the design is neat – no messy wires on display when printing and the ‘all-in-one integration’ (compared to models such as the Ender range) of the components is tidy – easy access for any maintenance is a good design feature.
Another useful inclusion is the filament detector – if a machine runs out of filament in the middle of a print, it will automatically pause to allow a change of filament and then resume from where it stopped. It is also able to resume a print in the event of power loss – these two features are good to have, especially at this price point. More expensive printers (such as our Ultimaker 2 Extended+) lack these very useful additions.
For the purposes of our print farm, we have needed to be printing high-quality models constantly, so that the headbands and visors can pass our QA standards so we know they are safe to wear before they are sent out to local keyworkers. For the most part, after a few days of getting used to the quirks of the printers, they have handled this task exceptionally well for such low cost machines. With tweaking of the print settings to get the balance between time and quality right (and it took a little experimentation to figure out what worked best, as 3D design often does), we’ve been able to reach the stage where we are happy with the reliability and speed of the prints.
Our biggest problems have been getting the bed levelling to work consistently. Even with a combination of auxiliary, auto-levelling and distance sensor tweaking, we have found that on a number of our printers, the levelling tends to quickly change (even over the course of a day) and this can noticeably adversely affect print quality if it is not addressed. Although we are using them continuously, they were set up identically to begin with and the patterns of error are not consistent or limited to just one rogue machine. This means time that could be spent printing is instead spent on diagnostics. The fan duct also fell off a number of our machines after just a few weeks of printing – fortunately we were able to 3D print replacements but we’d have hoped for slightly better durability.
Our conclusion
Although there have certainly been some bumps and failed prints along the way, we like the design and beginner-friendly nature of these printers. As we talked about in our last blog post, some of our amazing volunteers had never even seen, let alone operated, a 3D printer before, but were quickly able to learn the ropes of these machines. The Creality CR-10S Pro printers represent good value for money and have been good, low-cost workhorse machines when we’ve needed them.